Get a Test API Key
To use SignatureAPI in Power Automate, you need an API key. You can start with a free test API key to try out the platform. Here’s how:Sign Up
Sign up for a free SignatureAPI account.
Get your API key
Go to the API Key section in your SignatureAPI settings to get your test key.
- Don’t send emails to recipients, but you can see them in the Email section of your dashboard.
- Are not legally binding.
- Are free to use.
Create a Connection
Use your test API key to create a connection to SignatureAPI in Power Automate:Add a SignatureAPI action
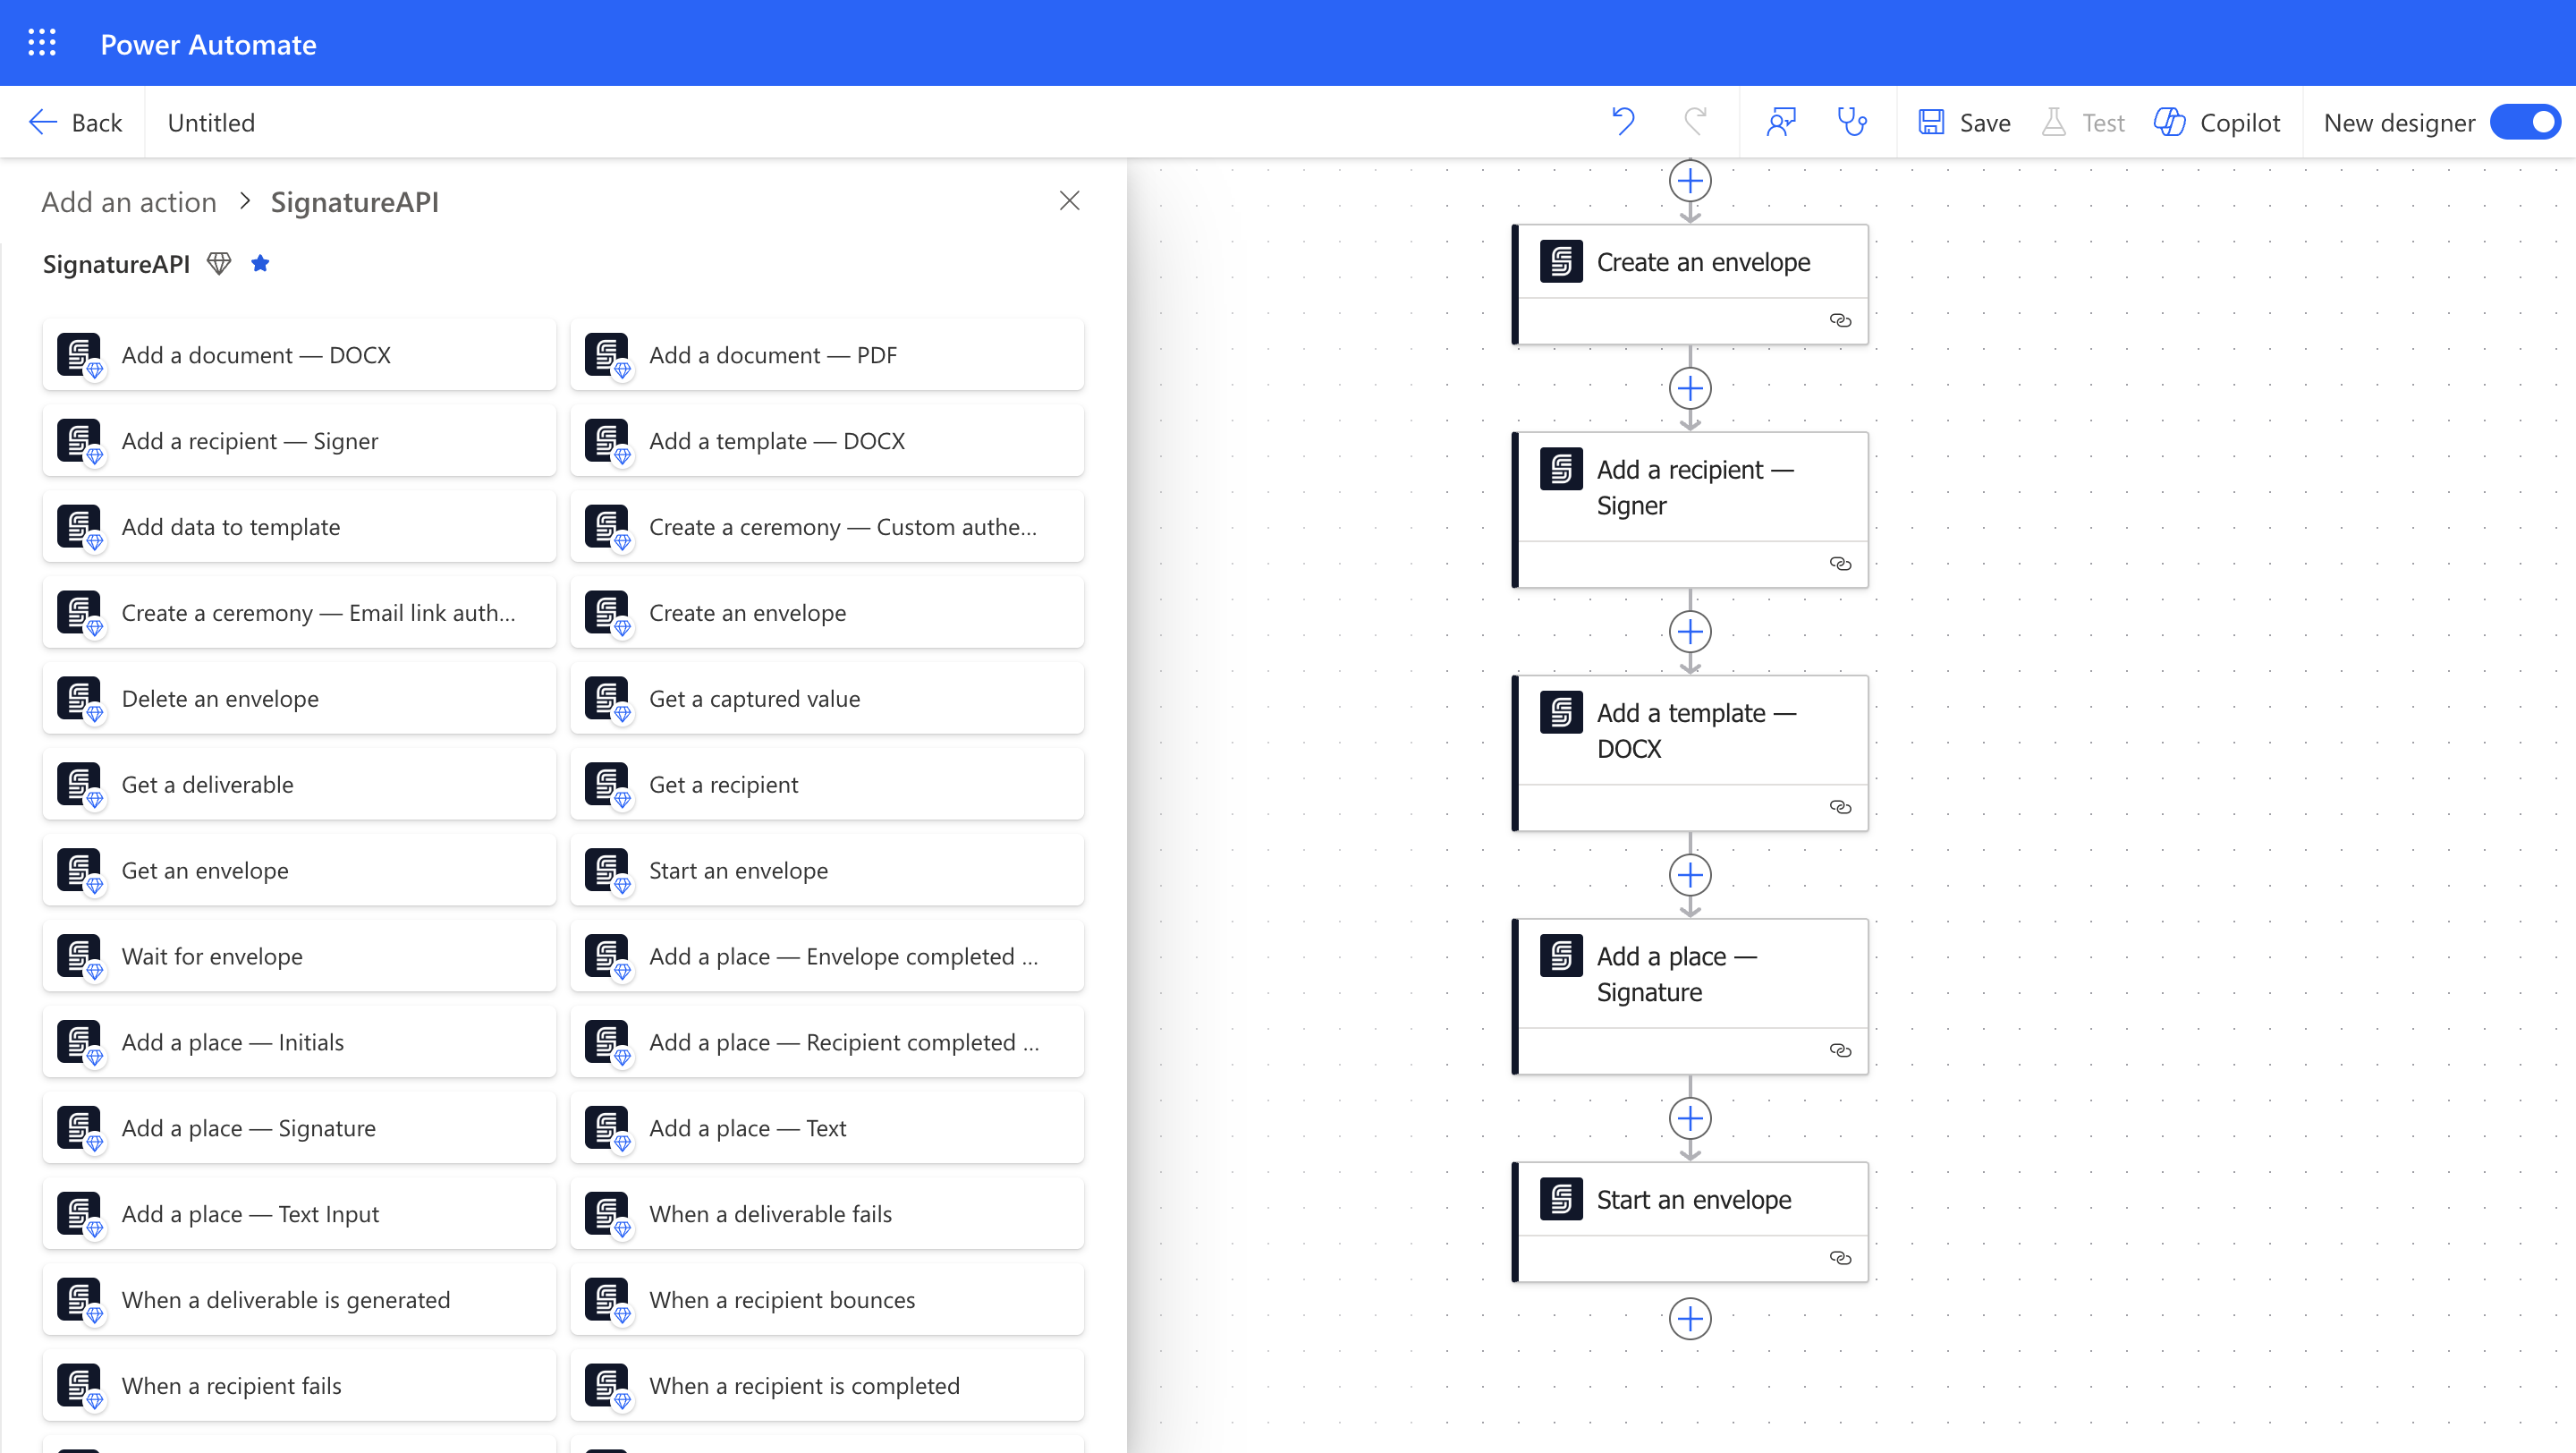
Add the Create Envelope action from SignatureAPI.
Your First SignatureAPI Flow
Follow our Quickstart to create an envelope and send it with SignatureAPI.Switch to Live Mode
When you’re ready to send legally binding envelopes, add a payment method and get a live API key. Live envelopes:- Send emails to recipients. You can also view these emails in your dashboard.
- Are legally binding.
- Are billed.
SignatureAPI Live.