MCP Server
Quickstart
Connect SignatureAPI to your favorite AI app and send your first envelope by chatting with it.
This guide is for anyone who wants to use SignatureAPI from an AI app like Claude or ChatGPT. No code, no technical setup. If you can sign in to a website and click “Allow,” you have everything you need.
What this gives you
Once you connect, you can ask your AI assistant to do things like:
- “Send this contract to alex@example.com for signature.”
- “Show me the envelopes I sent last week.”
- “Has Maria signed the NDA yet?”
- “Cancel the envelope I sent to the wrong address.”
The assistant talks to your SignatureAPI account on your behalf. You stay in control: you approve the connection once, and you can disconnect it at any time.
What you need
- A SignatureAPI account. If you don’t have one, sign up first; the free plan is enough to try this out.
- One of the supported AI apps: Claude Desktop, Claude.ai, or ChatGPT (Plus, Pro, Team, Enterprise, or Edu plan; custom connectors are not available on the free plan).
- A working internet connection. If you are on a corporate network, your IT team may need to allow traffic to
*.signatureapi.com. - If you use Claude, allow the SignatureAPI domain inside Claude itself: go to Settings → Capabilities and add
*.signatureapi.comto the allowed domains. The wildcard is required so Claude can reach every subdomain involved in the connection. Without this, some tools may not work correctly.
Step 1 — Open your AI app’s connector settings
The exact menu name varies, but every supported app has a “Connectors” or “Custom connector” section:
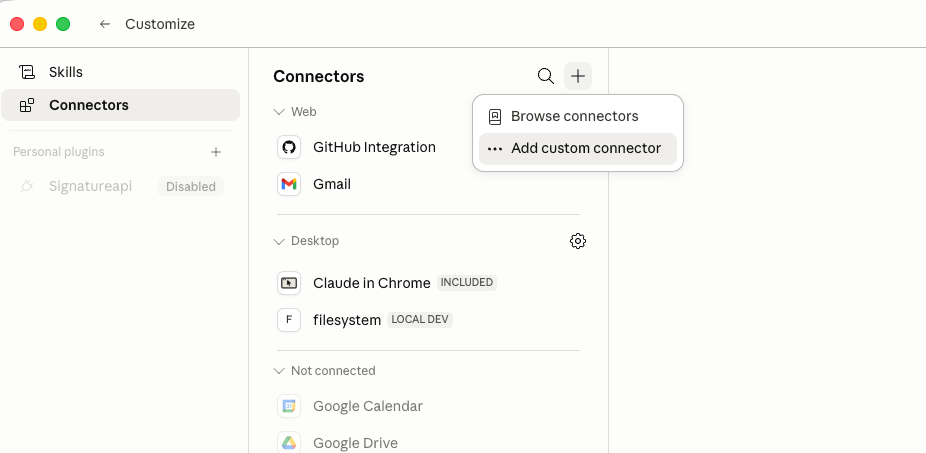
- Claude Desktop and Claude.ai: click Customize in the sidebar → Connectors → click the + icon to Add connector → Add custom connector.
- ChatGPT: open Settings → Connectors → Advanced and turn on Developer mode (a one-time step). Then go back to Settings → Connectors → Add new connector.
Step 2 — Add SignatureAPI as a connector
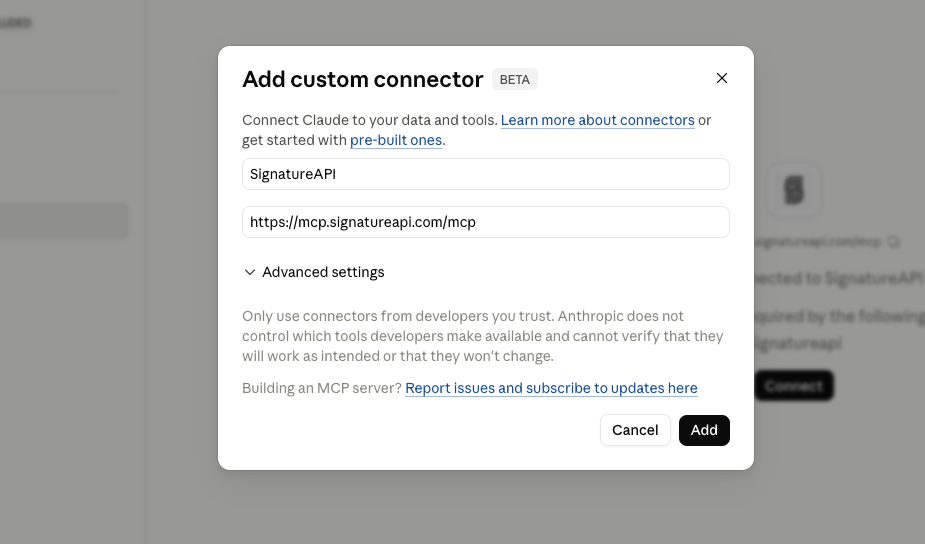
When the app asks for the server URL, paste:
https://mcp.signatureapi.com/mcpIf you use ChatGPT, paste this URL instead:
https://mcp.signatureapi.com/mcp/chatgptGive the connector any name you like (for example, “SignatureAPI”), and save.
Step 3 — Sign in to SignatureAPI
A browser window opens automatically. Sign in with your SignatureAPI account, pick the organization you want the assistant to work with, and click Allow.
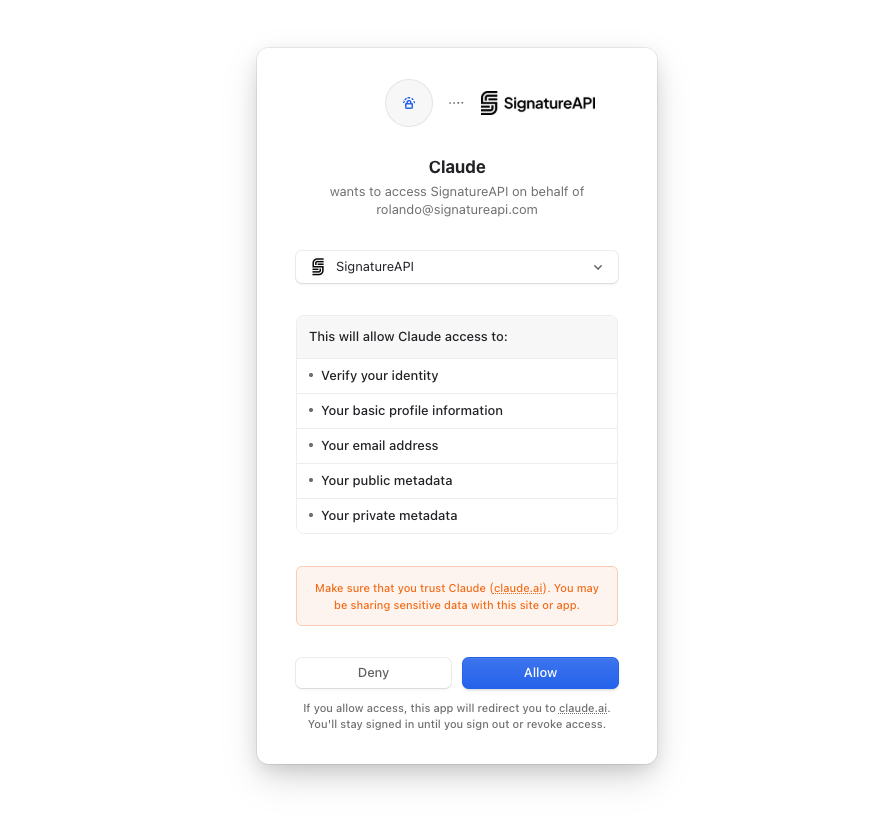
That’s it. You only have to do this once per app.
Step 4 — Try it out
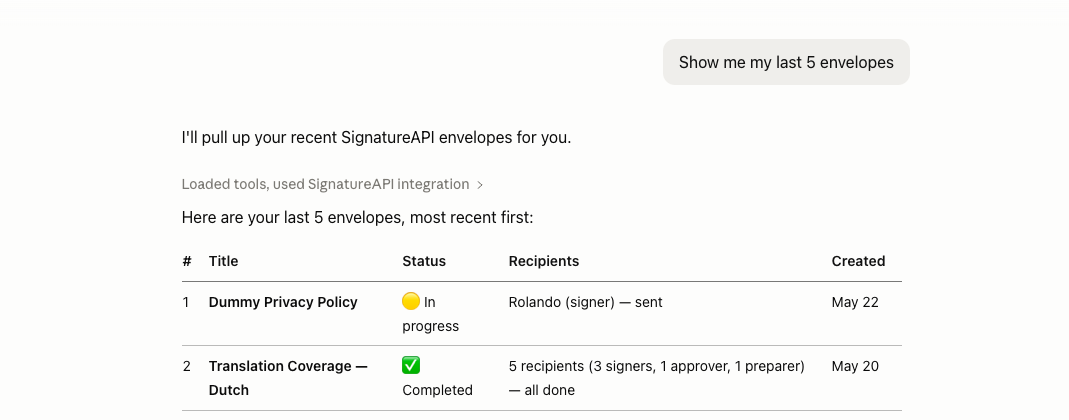
Go back to your AI app and ask something simple:
Show me my last 5 envelopes on SignatureAPI.
If you see a list of envelopes from your account, the connection is working.
Sending your first envelope by chat
You can describe what you want in plain English. For example:
Send this document to sign user@example.com
(Attach the PDF you want to send to the chat.)
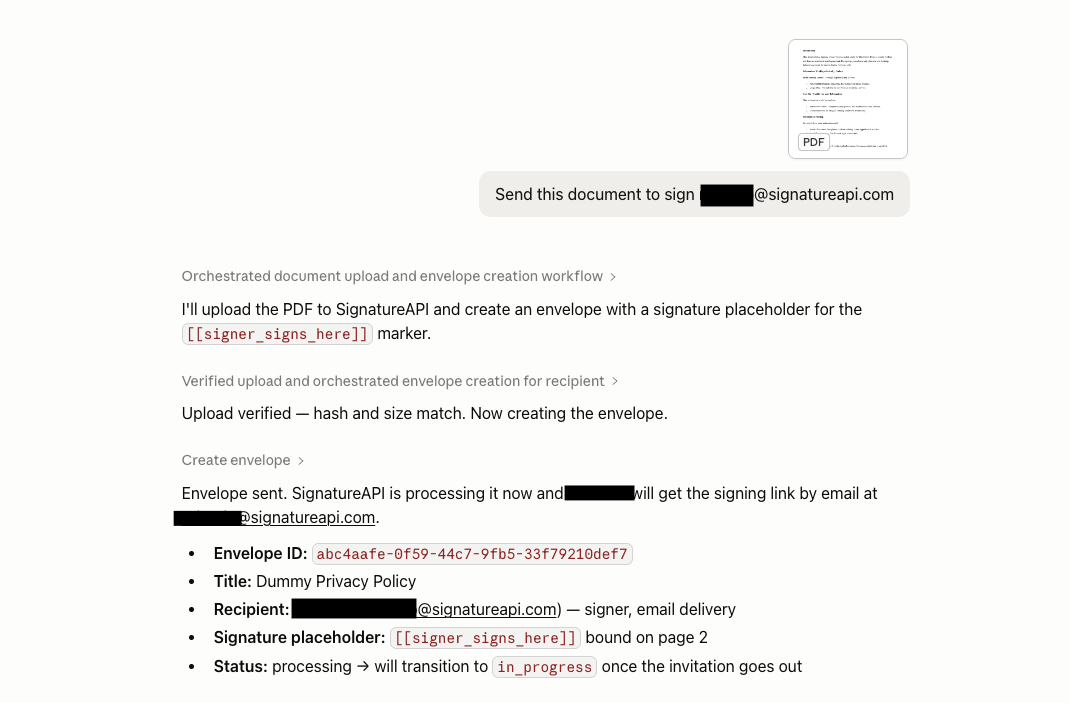
The assistant will:
- Create the envelope on your SignatureAPI account.
- Show you a summary of what it did.
- Trigger the signing email to your recipient.
A few tips:
- Whitelist signatureapi.com domains. If you don’t uploads won’t work.
- Be specific. “Send the contract to John for signature with a signature line on page 3” works better than “send this to John.”
- Confirm before sending. The assistant will usually summarize the envelope before creating it. Read it carefully; once an envelope is sent, recipients are emailed immediately.
Staying in control
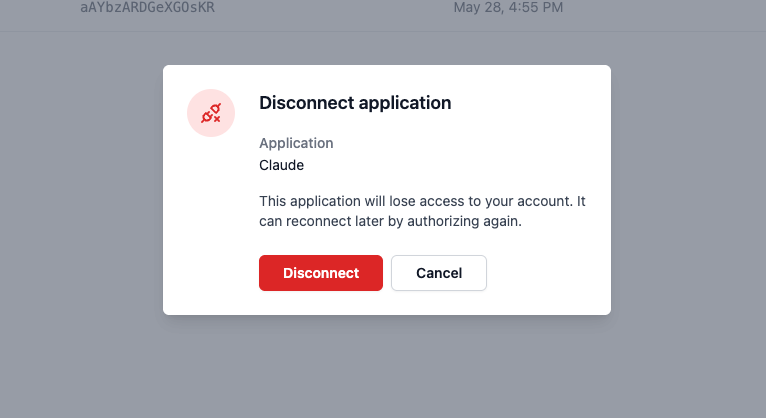
- You can disconnect anytime. In your SignatureAPI dashboard, go to Settings → Applications to see every connected AI app and remove the ones you no longer want.
- The assistant only sees your account. It can do what you can do in the dashboard, no more.
- No data is shared with us by the AI app. The assistant calls SignatureAPI directly using your authorized connection.
Where to go next
- Connecting clients — detailed setup for every supported AI app.
- Tools and resources — the full list of things the assistant can do.
- Managing connections — review and revoke connected apps from your dashboard.